
Content
A. Creating own contents
B. Publishing contents
As a Content admin you can create your own content for your community. The content can consist of different programmes, tests and videos. In your own programs you can use HeiaHeia's different sport and wellbeing activities, from which you can choose the content that works the best for your community.
Contents will be published in the HeiaHeia library folders. In some special cases it is possible to use the content for example as a mandatory test or program in the onboarding process or in coaching, even though the content is not visible for users in the library.
A. Creating your own content
Content is created in the content admin view where you will have access with content admin rights. Log in with your email and password -> My HeiaHeia -> your organisation -> admin tools -> old admin panel. Or log in directly here: heiaheia.com/admin.
1. Creating a program
In your program you can include trainings, wellbeing activities, tests, videos and texts.
In admin-panel: Choose Create programs.
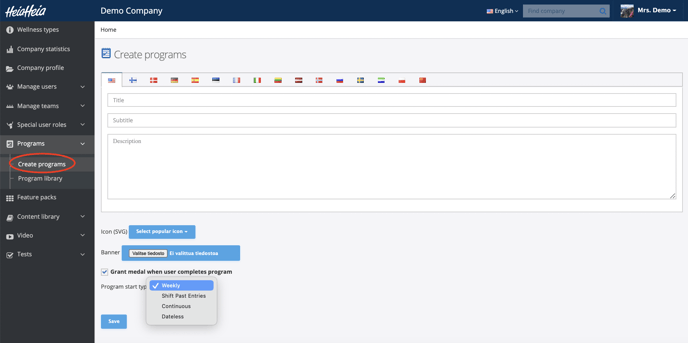
Pic. 1: Creating a program.
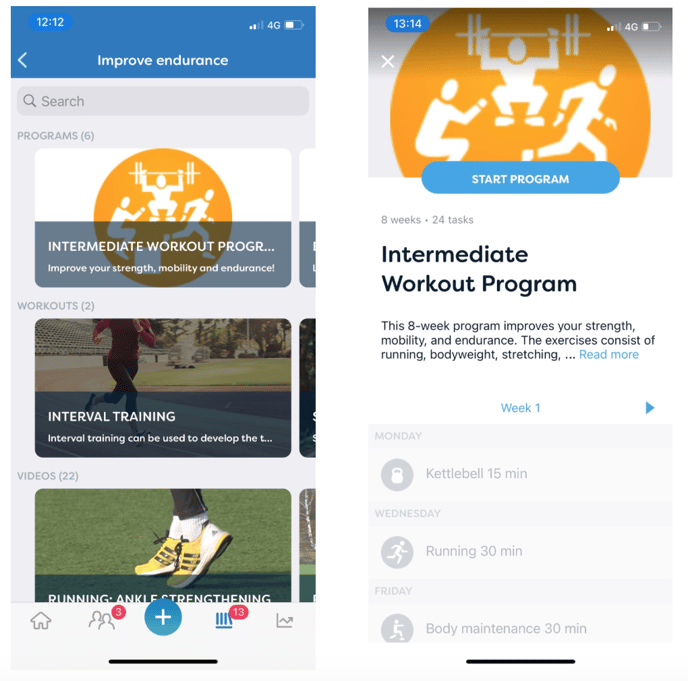
Give your program a title, subtitle and a description. These three are mandatory. The title and the subtitel show on the library banner so it is a good idea to use short texts. The description appears when you open the program in the library so it can be as long as you wish. (s. pic 2).
Enter the title, subtitle and description in the text fields under the US flag (default language) and under the flags of your desired languages.
Choose an icon and/or a banner picture for your program. This is not mandatory - the program will use the icon as picture if there is no picture available.
Grant medal: Choose, whether you wish to grant a medal for the user for completing the program.
Choose the program type:
- Weekly. The program is based on a weekly structure and the tasks will appear by week days (several tasks per day possible). The program always starts on Monday, even if there are no tasks for Monday.
- Shift past entries. Like the weekly program, but all previous tasks are moved to the start date if the start date is not Monday.
- Continuous. Program does not follow a weekly structure, tasks numbered by days, there can be several tasks on the same day, programme starts "today".
- Dateless. The program is a "to-do list" with tasks in numerical order.
-> Save.
Continue by adding a new week (even if you chose continuous or undated as a program type).
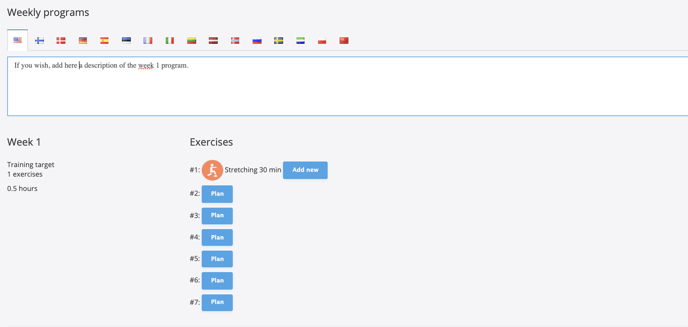
Pic. 3. Adding weeks and content to the program.
Click #Plan to create content for the day.
To create multiple tasks or tips, click on Add new.
Under each week you will see how many trainings you have planned for the week and how much time is needed for it.
Add as many new weeks as needed.
If desired, write a description of the week's tasks (in English + your language). The description appears only when using the HeiaHeia browser version, not in the app.
-> Save.
First, choose what kind of task you want to create: a training, wellbeing activity, video or test. Pick up the task type in the dropdown list and add your content according to the instructions below.
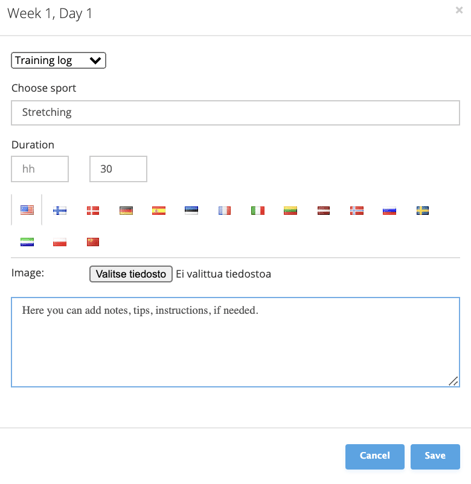
Pic 4. Adding new content.
- Training: Enter your preferred sport in the drop-down menu and set the duration of your workout. You can add text instructions, pictures or videos to notes. Photos are added separately, videos as Vimeo or YouTube links in https format (http does not work). Remember to copy the notes under both the US and your language flags. You can use all HeiaHeia sport arts.
- Wellbeing activity: Enter the activity you want in the drop-down menu. You can add text instructions, pictures or videos to notes. Images are added separately, videos as Vimeo or YouTube links in https format (http does not work). Remember to copy the notes under both the US and your language flags. The available wellbeing activities depend on the feature packs your community has.
- Tests (survey): If you want to add your own test to the program, you must first create a test under Tests -> create new test. It will then appear in the drop-down menu when you create a task and can be selected as the task for the day. (See Creating a test).
- Video: First, create a video in admin under Video -> create a new video. (See Instructions chapter 3). It will then appear in the dropdown menu and can be selected as a task for the program. Videos can also be added as links in Notes: first select as type wellbeing activity and in the dropdown menu select tip. Copy the link to the video into notes (in English + your language).
-> Save.
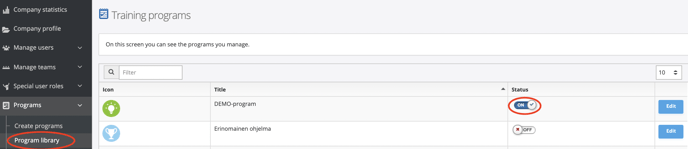
Pic 5. Program library
Once your program is created and saved, you can see it in the admin under Programs -> Program library. Here you have all the programs you manage. To add your program to the content library later, set the status to ON.
2. Creating tests
Start by planning what type of questions you want to include to the test and how you want them to be answered as well as how to give feedback. You can create different types of questions and answer options, such as multiple choice, yes/no, numerical scales, free text, etc. and decide whether you prefer to give feedback for example per question or after finishing the test.
Start by selecting Tests -> create a new test in admin.
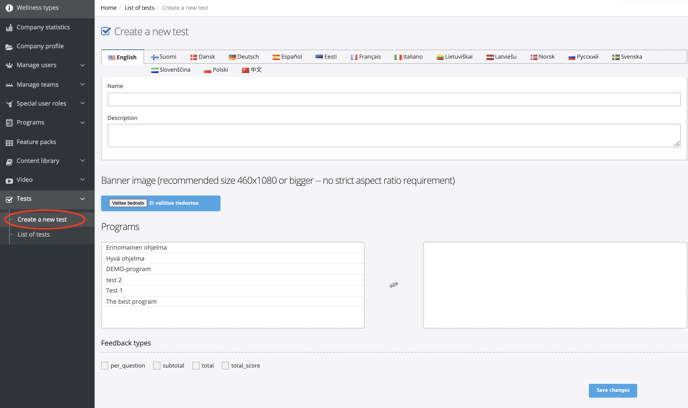
Pic 6. Creating a test.
Give your test a title and a description. Enter the title and the description in the text fields under the US flag (default language) and under the flags of your desired languages.
Then choose the program where you want to include the test. Click the program in the box to select it.
Feedback types:
Choose between 4 different feedback types:
- Per question: Feedback per each question.
- Subtotal: Choose certain questions and give subfeedback to these questions. You can have several subfeedbacks.
- Total: Feedback after finishing the test.
- Total Score: Feedback and test score after finishing the test.
You can choose more than one type. Read more about feedbacks below.
-> Save
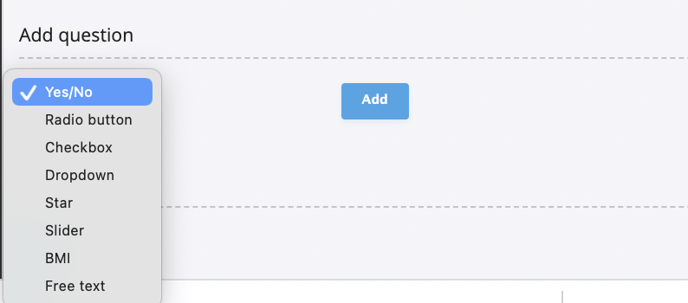
Pic 7. Choosing question types.
Add a question
Choose the question type in the dropdown list and click on Add.
Question types:
- Yes / no -answer
- Radio button
- Checkbox
- Dropdown list (the pre-set answer options in the list)
- Stars (give stars, for example 1-5)
- Slider (select a "rating" e.g. from 1 to 10)
- BMI (calculates BMI)
- Free text answer
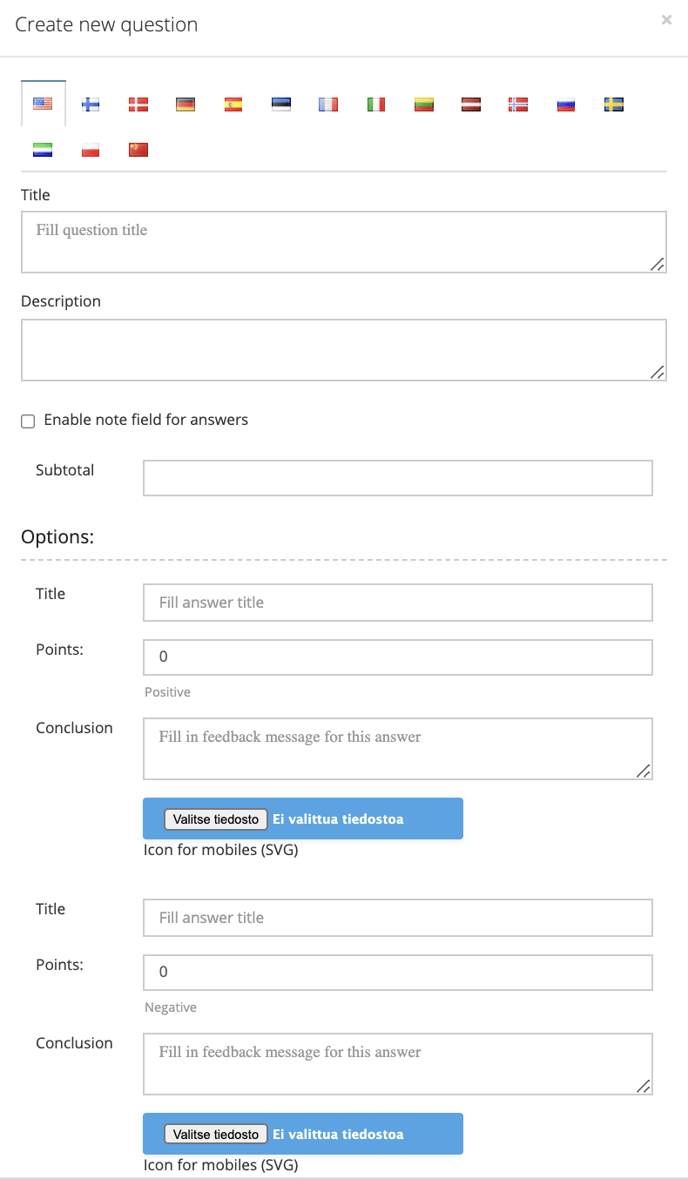
Enter the question into the Title field (in English and in your language) and if you wish, also a description.
Add a field for notes to the question, allowing the user to add a comment to their answer if necessary.
The Subtotal function allows you to group questions under different sub-feedbacks. For example, the subtotal nr. 1 feedback is selected for questions nr. 1 and 2 (different feedbacks depending on the score). Subtotal nr. 2 feedback is given for questions 3, 4 and 5, etc. The scores will be defined later in the Feedback section.
Pic 8. Adding questions and answers.
Write the answer options to your question under Options.
-
Title: Answer to the question
-
Points for the answer
-
Conclusion: Feedback for the answer
You can add as many answer options as you wish. Click on Add option.
Add Feedback
Feedback will be added either when creating the questions or separately in the Feedback section. This depends on the type of feedback.
Feedback types:
Choose between 4 different types of feedback how you want to give feedback (can be selected when creating the program):
- Per question: Feedback separately for each question. Enter feedback into the text field Conclusion
- Subtotal: Sub-feedback for questions groups.
- Total: Total feedback in the end of the test.
- Total Score: Total feedback with test score in the end of the test.
To add your feedback, select New(?) and enter your feedback into the text field Conclusion.

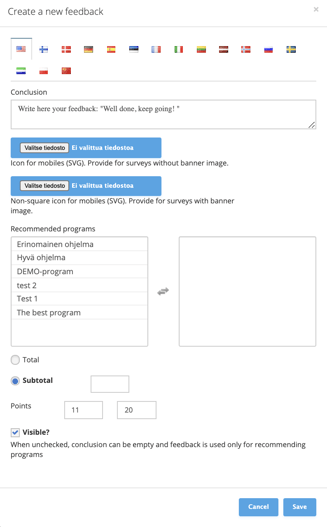
Fig 9. Creating feedback.
You can give feedback such as a recommendation to start a specific programme. Select a program from Recommended programs.
Then select whether your feedback is total or subtotal. If you are using sub-feedback, enter a number to the sub-feedback, e.g. subtotal 1, 2, 3, etc. and then set a score scale for the sub-feedback.
-> Save. You can now see your Feedback in the list.

Fig 10. List of feedbacks.
When your entire test is complete and saved, you can see it in the admin under Tests -> Test list. To add your test to the library later, set the status to ON (enabled).
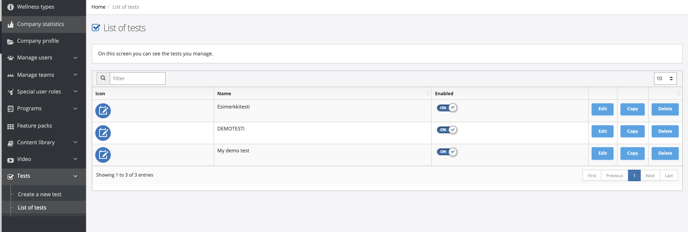
Fig 11. List of tests
3. Creating videos
You can add either vimeo or youtube videos to your programme.

Fig 12. Creating videos.
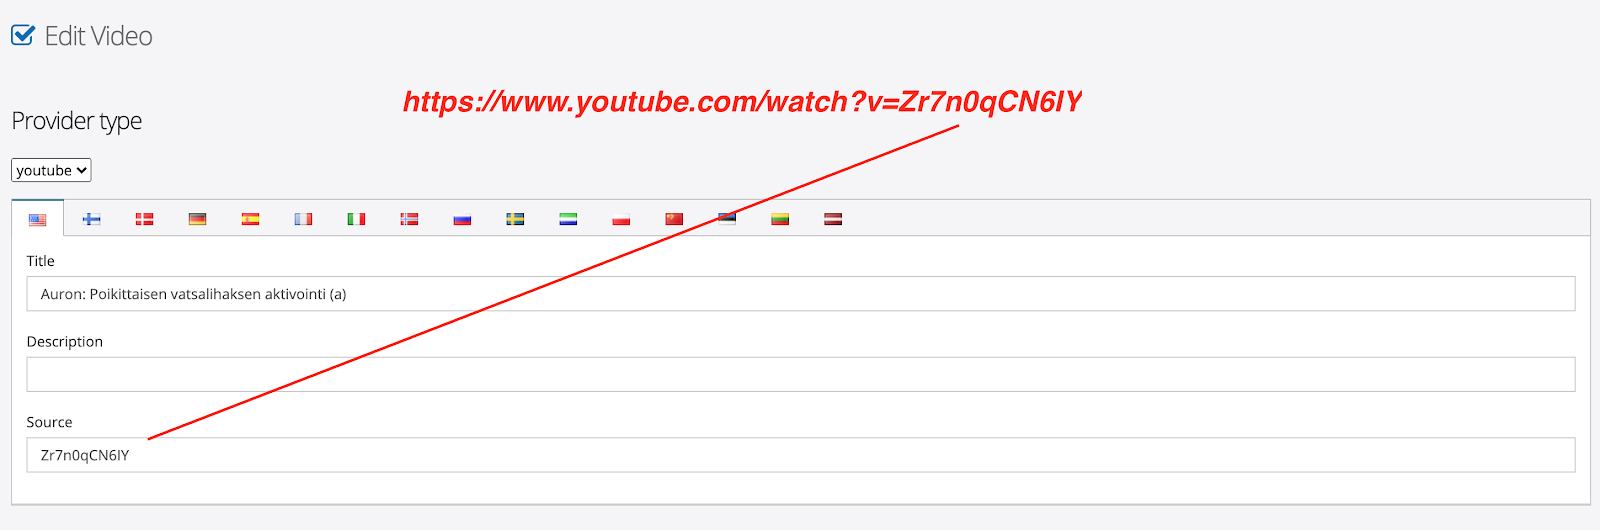
Give your video a title and if needed, a description (in English and under the flag of your language).
Note! Add a Source (Video ID) for the video. This you will find in the video url.

Fig 13. Video ID (source).
Once your videos are saved in the video list, you can add them to your programme.
B. Publishing your content
Programmes, videos and tests are published in libraries (Content library).
You can build several folders in the library, with subfolders under each folder if necessary.
First plan what structure works best for your content and create the folders and subfolders for your library accordingly (see picture).
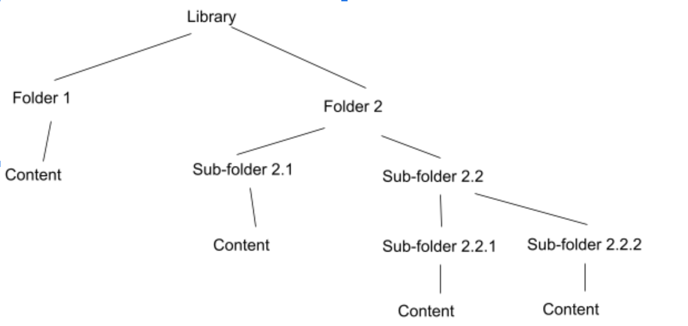
KUVA 14. Example of a library structure.
1. Creating a library
Level 1. Library
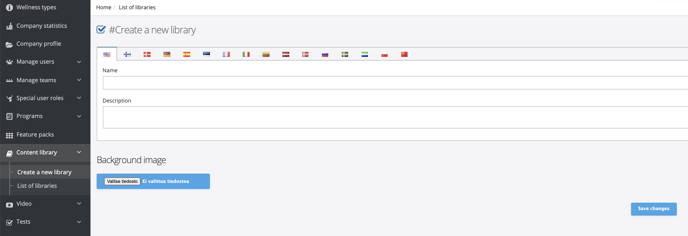
Fig. 15. Creating new library
Start by creating a new library: Content library -> Create a new library.
Enter a name for the library and if needed, a description. Write the texts under the US flag and under the flag of your language.
Add a picture for the library (jpg, preferably under 500kb, 1125 × 516). The picture is mandatory.
-> Save changes
You can now find your new library under List of Libraries. Your own libraries are marked as Own and can be edited. Other libraries that may be used by the community are marked as assigned libraries. They appear in the list, but you will not be able to edit them.
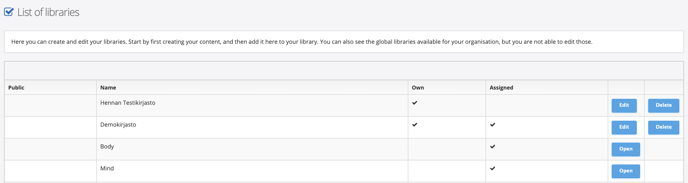
Fig 16. List of libraries.
Level 2. Folder
Continue on the page List of Libraries. Choose Edit and add a folder to your library -> Add folder.
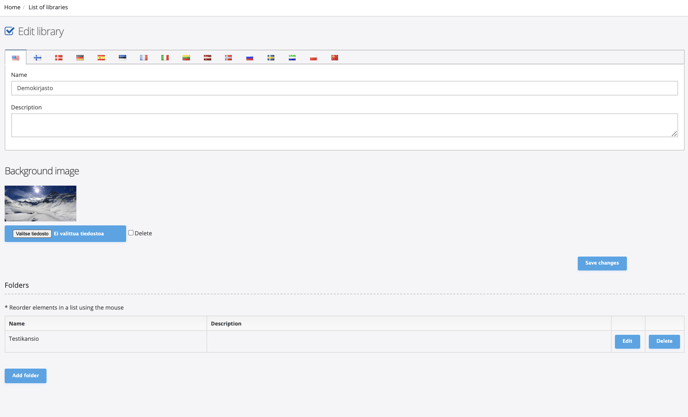
Fig 17. Adding folders into the library.
Add a name, description and a picture for the folder (jpg, preferably under 500kb, 1125 × 516). The picture is mandatory.
-> Save.
Level 3. Subfolder
Once a folder has been created, you can create subfolders under it in the same way as folders. Click Add subfolder. NOTE! This must be done immediately when creating the new folder (not possible afterwards)!
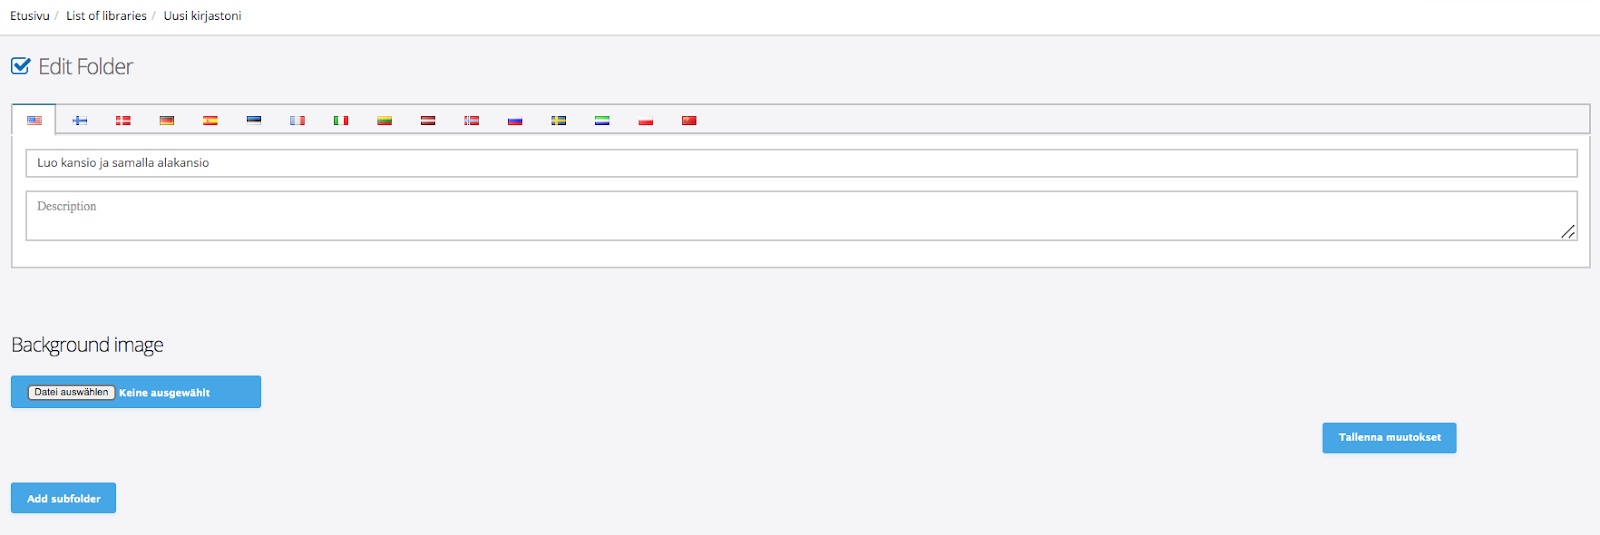
Fig 18. Adding subfolders.
-> Save changes.
2. Adding content to the folder
Erityyppiset sisällöt löydät pudotusvalikosta. Jos et löydä hakemaasi sisältöä, tarkista kohdasta Ohjelmakirjasto -> Testilista, että olet sisältöjä luodessasi kääntänyt on/off-kytkimen ON-asentoon.
You can find your programmes, videos and tests in the drop-down menu. If you can't see your content there, check under Program Library and/or Testlist that you have turned the on/off switch to ON.
Select the content in the folder and click Add (new) to add the content to the folder. Once all the content is saved in your library folder, you're almost done!

Fig. 19. Adding content to folders.
3. Publishing libraries
The final publication of the library will be carried out by HeiaHeia. When your library is ready, ask HeiaHeia to publish your library. Please give us the exact name of your library and the community to which you want it to be published.
4. Feature packs
Feature packs are used to publish libraries in more than one community. If you are only producing content for one organisation, there is no benefit to using a feature pack. You can skip this part.
If you publish your library to more than one organisation, create your own feature pack as follows:
Click on Feature pack -> Add new. Give your Feature pack a name - preferably one that identifies your organisation. Below this you will see all the libraries you have created and you can select which libraries you want to be part of that Feature pack. Select the relevant libraries in the feature pack by clicking on them and changing the status to ON and save.
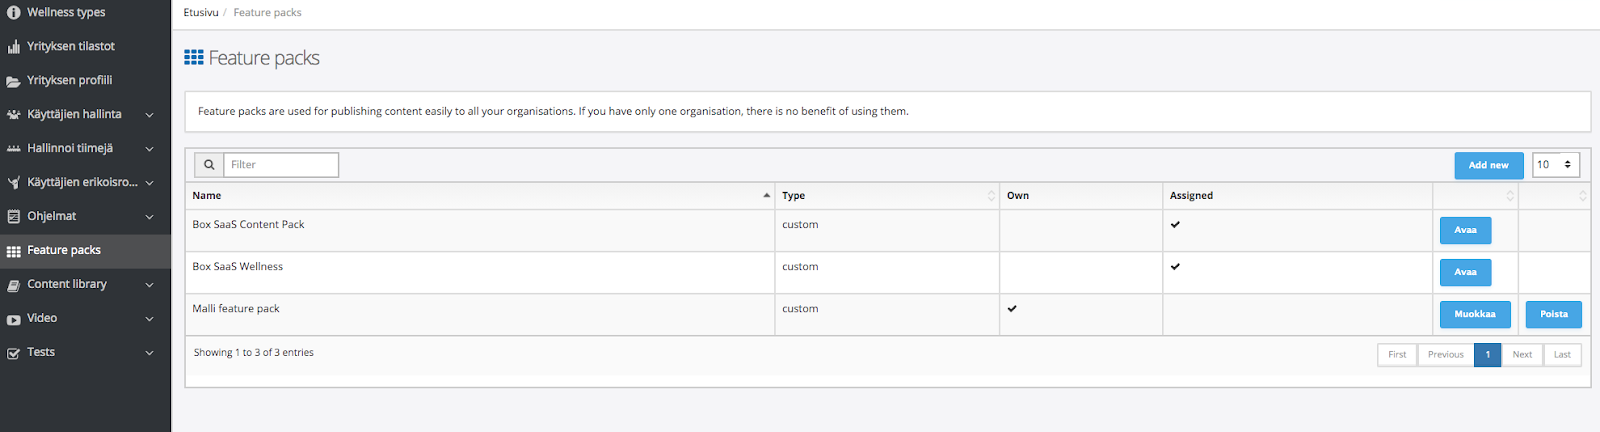
Pic 20. Creating Feature packs.
Your feature pack will be listed as Own and can be edited or deleted.Please ask HeiaHeia to publish your content with a feature pack and tell us the exact name of your feature pack.
5. Later editing of contents
Note!
When members of your community start your program, a copy of the program is created for the user at that moment. If the program is modified after the user has started it, the changes won't be visible to her/him. They will appear only in programs started after making the changes, not for copies already created. Therefore, all programs and any links should be checked carefully before publishing the program. If you have a test community, we recommend testing the program there before releasing it to the real community.